Vegetable & Flower DIY Growbag Kit
Why TessaGrows Growbags?
TessaGrows Vegetable and Flower Growbag Gardens grab your attention and care without being overwhelming. Beginner gardeners are able to manage the process by themselves, with minimal parental guidance. Growbags are portable and can be positioned for maximum sunlight. They are also not permanent and can be moved or dismantled very easily to be used in the future. In addition, good quality potting soil can be expensive, and a small fabric bag requires little potting soil. Most plants can grow in a 12” deep, 12” in diameter, 5-gallon fabric growbag.
How to Use Your DIY Growbag Kit

Seed templates solve the problem of how to space and conserve seeds by offering diverse seeds, chosen for small container gardening, optimally spaced apart so each seed has its place in the soil. Using the templates also saves on the need to purchase multiple seed packs. Substitute seeds are included in the event the template fails, or to add when the plants have been eaten or are over their season.
TessaGrows Vegetable and Flower Seed Templates

Know Your Growbag

Watering Tips
Growbags can easily dry out as the side of the bags are unprotected from the force of the wind and sun. That’s why they need to be watered every day in summer and sometimes twice. If you have more than one bag, place them close to each other so there’s less places for water to escape. If you water your grow-bags with a hose or hard spray them, the soil will get hard and growth might be stunted. Use a watering can with a rose spray for best results.

Sprouting Tips
Seeds are trickier than they seem, and all the seeds in your template may or may not germinate. It depends on many factors. Here are some tips to promote maximum germination:
-
Keep the top inch moist at ALL times.
-
Check often by sticking your finger into the soil at the edge of the bag so you do not disturb the template.
-
You’ll know the coconut coir is too dry if it turns a lighter color.
-
The seed template may become exposed after you place it.
-
If this happens before the seeds sprout, try and cover it again by spreading out the coconut coir. If this doesn’t work, add a thin layer of potting soil to cover the exposed parts.
-
If this happens after the seeds have sprouted, poke holes in the template (not near the seedlings), and it will break up quickly after that.
-
-
In summer, make use of morning sun only for your newly planted growbag. In winter, longer hours are fine. Move to full sun when the seedlings are strong.
Feeding Your Growbag
Growbags lose some of their nutrients when water runs through them. For this reason, you should feed your growbag once a week with the seaweed included in your kit.
The soluble seaweed powder is a potent solution that's perfect for feeding your plants. Seaweed is a gentle, nourishing food that gifts the nutrients and vitality of the sea to your landed garden. This miracle food has more than 60 enriching micronutrients that are easily accessed by all plants and are ready to use without any extra work from your herbs, flowers and vegetables. Seaweed also contains natural hormones to help your plants grow strong and robust from the roots to the flowers.
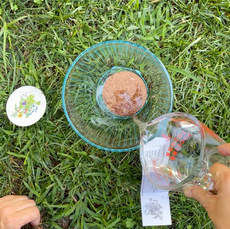
Mix 2 pinches or ¼ tsp seaweed in 4 cups water and stir. Fill your watering bottle with the mixture and feed your bag gently and slowly taking care not to knock the delicate seedlings.
When the seedlings are 4-weeks old, add some compost to the bag without getting any on the stems and leaves. Worm poop from a worm farm is excellent fertilizer. Contact TessaGrows for more info.


